Are you trying to curl your super straight hair? Or you’re just looking for an easy way to get deeper curls?
Either way – there’s some great news. Today we have lots of different methods to get curly hair:
- from classic heat curlers
- to non-heating tools
But today, I want to show you a really different method – how to curl your hair with sticks.
This method has a few advantages – because you can do it with or without heat. Plus, there are several ways to do it.
So let’s take a look at the easiest 3 methods.
#1 – Foam Stick Rollers
This method has one major advantage – it’s pretty fast.
So you won’t have to curl each hair strand separately, which would probably take hours.
Therefore – it’s perfect for people who need loose curls within minutes. Plus – it doesn’t use heat, so there are zero chances of damage.
What you need: Foam rollers, shampoo + conditioner, a hair brush, a blow dryer (optional).
HOW TO DO IT
#1. Wash your hair – using both shampoo and conditioner and make sure it’s 80% dry.
#2. Section it in the middle and tie the left side. You’re going to start with the right side (it’s easier).
#3. Divide the right side in another 5-6 parts (depending on how much hair you have).
#4. Add a foam stick and roll a big strand of hair around it.
The foam sticks are very flexible – so twisting them is really easy. They should hold your hair well enough.
#5. Do this for every part from the right side.
#6. Once you finish, move on to the left side. Divide it into smaller pieces as well and add the rollers around each hair strand.
#7. Let the rollers sit for 15-20 minutes (or more if you can). You can also let them overnight – but it’s not a must.
Remember – the more you let them sit, the tighter your curls will be.
#8. Take off the rollers and brush your hair. The curls may look kind of messy at first – but brushing them out should make the look better.
Here’s a video that should help you more than the text:
Main Advantages Of This Method:
- no heat – so there’s no risk to damage your hair
- pretty tight curls
- you only need a few minutes (you can also do it overnight, but it’s not a must)
Biggest Downsides:
- your hair needs to be damp or just washed
- it works better for wavy or curly hair
- not very comfortable to keep those rollers on your head
But overall – I think it’s a method worth trying, at least once in your life. If you don’t have a lot of time to style your hair – it’s one of my top recommendations.
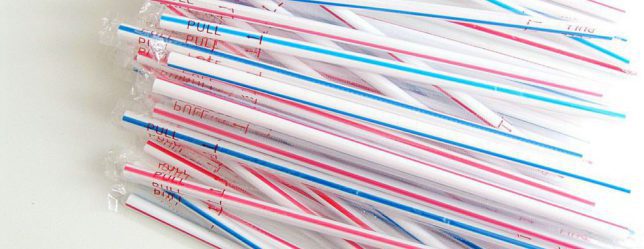
#2 – Regular Straws
This method used to be really popular about 3 years ago.
Now – it has some great results, compare to the other methods. The curls are much tighter and they last for several days (even for straight hair).
But you also need a long time to do it – plus, you have to let the straws sit for longer.
That’s why I consider it more difficult than the other 2.
However – the final result is definitely worth all that work.
What you need: Any kind of straws, hair pins, a hair brush, patience.
HOW TO DO IT
#1. Make sure your hair is wet – or at least damp. The curls will last longer in this way
#2. Once again, divide your hair in 2 sections.
#3. Take a small strand of hair and roll it around a straw. If you want looser curls – you can use bigger strands of hair.
#4. Use a hair pin to tie to top and the bottom part of the straw – so that it stays twisted.
#5. Do this for every part of your hair. Keep in mind that it’s going to take a while.
#6. Once you finish, either let it sit overnight. In case it’s too much – blow dry your hair for about 30 minutes then let it sit for another half an hour.
#7. Now you can gently remove the straws – just take care not to pull your hair. The curls should be very tight.
#8. Brush your hair – so that it doesn’t have a messy look. This should also give the curls more volume.
This video uses a very similar technique:
Main Advantages Of This Method:
- really tight curls
- they last for a lot longer – usually until you wash your hair (even for straight hair)
- no heat
Biggest Downsides:
- it takes a lot of time until you add thew straws
- works better if left overnight
- doesn’t look too good on short hair – since the curls are super tight
So I would recommend this method if you want some really curly hair – but you want to avoid heat. The curls are too tight for my taste – but lots of people love that kind of look.
#3 – Pencils + Flat Iron
Out of these 3 methods – this is probably the easiest one.
You can get different types of curls in a matter of minutes.
However, it doesn’t work without heat – so it’s essential to protect your hair, especially if you want to use it more often.
What you need: A few pencils (you can choose the sizes you want), a straightener, a protection spray.
HOW TO DO IT
#1. Your hair should be 100% dry – since you’re using it. Straighteners damaged wet hair a lot more.
#2. Apply a protection spray all over your hair (especially on the ends).
#3. Divide your hair in small sections. It’s up to you how small you make them.
The bigger the sections are – the loosen your curls will be.
#4. Roll a strand of hair around a pencil and press it with the flat iron. A few seconds should be enough.
You can take hair off the pencil immediately – and see how tight the curls are.
For looser curls – tie several crayons together and roll the hair around them, so the curl pattern will get larger.
#5. Do the same with each section of your hair. Try not keep the straightener on it for more than 10 seconds.
#6. Brush your hair – or run your fingers through it. In this way, the curls will look bouncier and thicker.
Here’s a video that can help:
Main Advantages Of This Method:
- extremely easy to do
- works really fast (less than 10 minutes)
- different curl patterns – you can get any type of curls
Biggest Downsides:
- uses it
- it can damage your hair if you use it daily
But overall – it remains one of my favorite methods, since it’s super easy. If you use a protection spray, there are small chances to damage your hair.
3 Things To Consider
So now that you know all these 3 methods – here’s the question:
Which of them works best for your hair?
Well – there are factors to consider before you pick one.
#1 – HAIR TYPE. Here’s the thing:
- curly or wavy hair tend to hold curls better
- straight hair needs a longer time to hold a curl
So basically – if you have straight hair, you need to let it sit for longer. Otherwise, your curls won’t last more than a few hours.
Also, in this case – I would recommend the straw method, with letting the straws in overnight. This kind of curls should last more.
#2 – TIME. It’s important to consider:
- how fast you need to style your hair
- how long you want it to last
- if you can let it sit overnight or not
Now – if you want the fastest method, pencils and heat is my recommendation.
If you want something pretty fast without using heat – go for foam rollers. And if you have plenty of time – the straws method is perfect.
#3 – CURL PATTERN. You need to decide on this from the start:
- tight or loose curls
- just waves
For a nice curl pattern – the first 2 methods are probably the best ones.
And if you only want some waves (and fast) – use pencils and a straightener. Just make sure you put several pencilss together, so that the curl pattern is larger.
My Verdict – Can You Curl Hair With Sticks?
Short answer: Definitely – it’s actually a really easy and comfortable method.
Now – it’s up to you what kind of sticks you choose:
- foam rollers
- straws
- pencils
Each of these methods works best in certain situations:
- foams are perfect for some fast curls – without using heat
- straws work great for really tight curls that last
- pencils can curl your hair immediately – in lots of different patterns
So before you choose a method – make sure it’s the right thing for you. But each of them should work fine – and with the results you wanted.
Now I would like to hear from you:
- Have you ever used any of these 3 methods?
- Is your hair naturally curly, wavy or straight?
- What do you normally use to curl your hair?
I’m waiting for your comments, questions or suggestion in the lines below.

